
Heads-up: using Miro on a large display requires decent processing power!
For this reason, we recommend using our Canvas interactive display with an installed OPS. This combination provides sufficient power to run Miro smoothly.
Another way is to use the processing power of the user’s laptops. This is what we call a Bring Your Own Device meeting and in that case, we recommend the Neo display.
Miro can also be added as an app in Teams, but in our experience, it is too much of a hassle for non-technical users to want to figure it out.
Miro on a Canvas display using an OPS
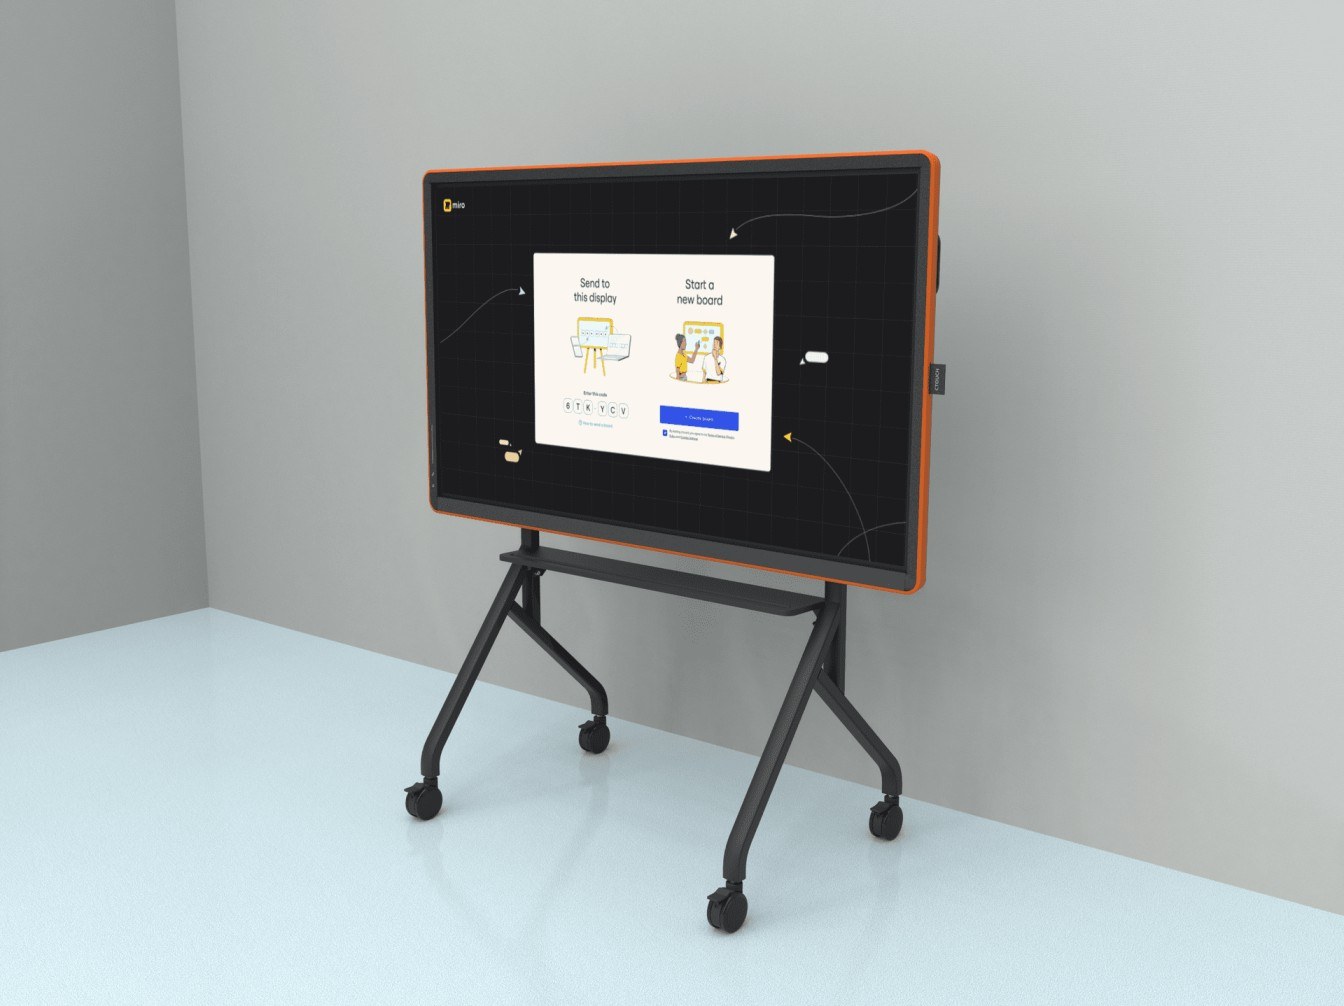
Canvas is a high-security display that relies on an attached computer to do computing. Miro needs one of these computers to run. CTOUCH provides an ideal PC solution that slides into the display for a seamless look; called an OPS. If your organisation already has mini PCs or NUCs that you wish to use, this is entirely possible!
- Attach the PC
- With an OPS you slide it in and it works
- Attach a USB-C High-Speed cable between the display and your Laptop. This allows both video and touch to pass.
- If this is not possible, connect the HDMI 1 and Touch Out USB 1 from the display to your PC for video and touch control
- Visit www.miro.com/apps and then install the Interactive Display app on the screen
- In BRIX for Teams Go we recommend adding a website URL instead. This seems to work better. To do this, add this www.miro.com/displays
- If you wish to only use the Miro app, set this as the only app to start in Kiosk mode with Windows: Set up a single-app kiosk on Windows - Configure Windows | Microsoft Learn
Miro on a Neo display using a cable
- Go to miro.com and login to your account
- Attach a USB-C High-Speed cable between the display and your Laptop. This allows both video and touch to pass.
- If this is not possible, connect the HDMI 1 and Touch Out USB 1 from the display to your Laptop for video and touch control
- Open your calling tool (e.g. Teams) and send everyone the link via the chat. Then share your screen
- You are all ready to go, and can control stuff on the screen as well!
- In the bottom right corner, you should see a hand symbol - that gives you control tips for using it on a touchscreen
Miro in Microsoft Teams
For the most up-to-date tutorial visit: Microsoft Teams app (user guide) – Miro Help Center
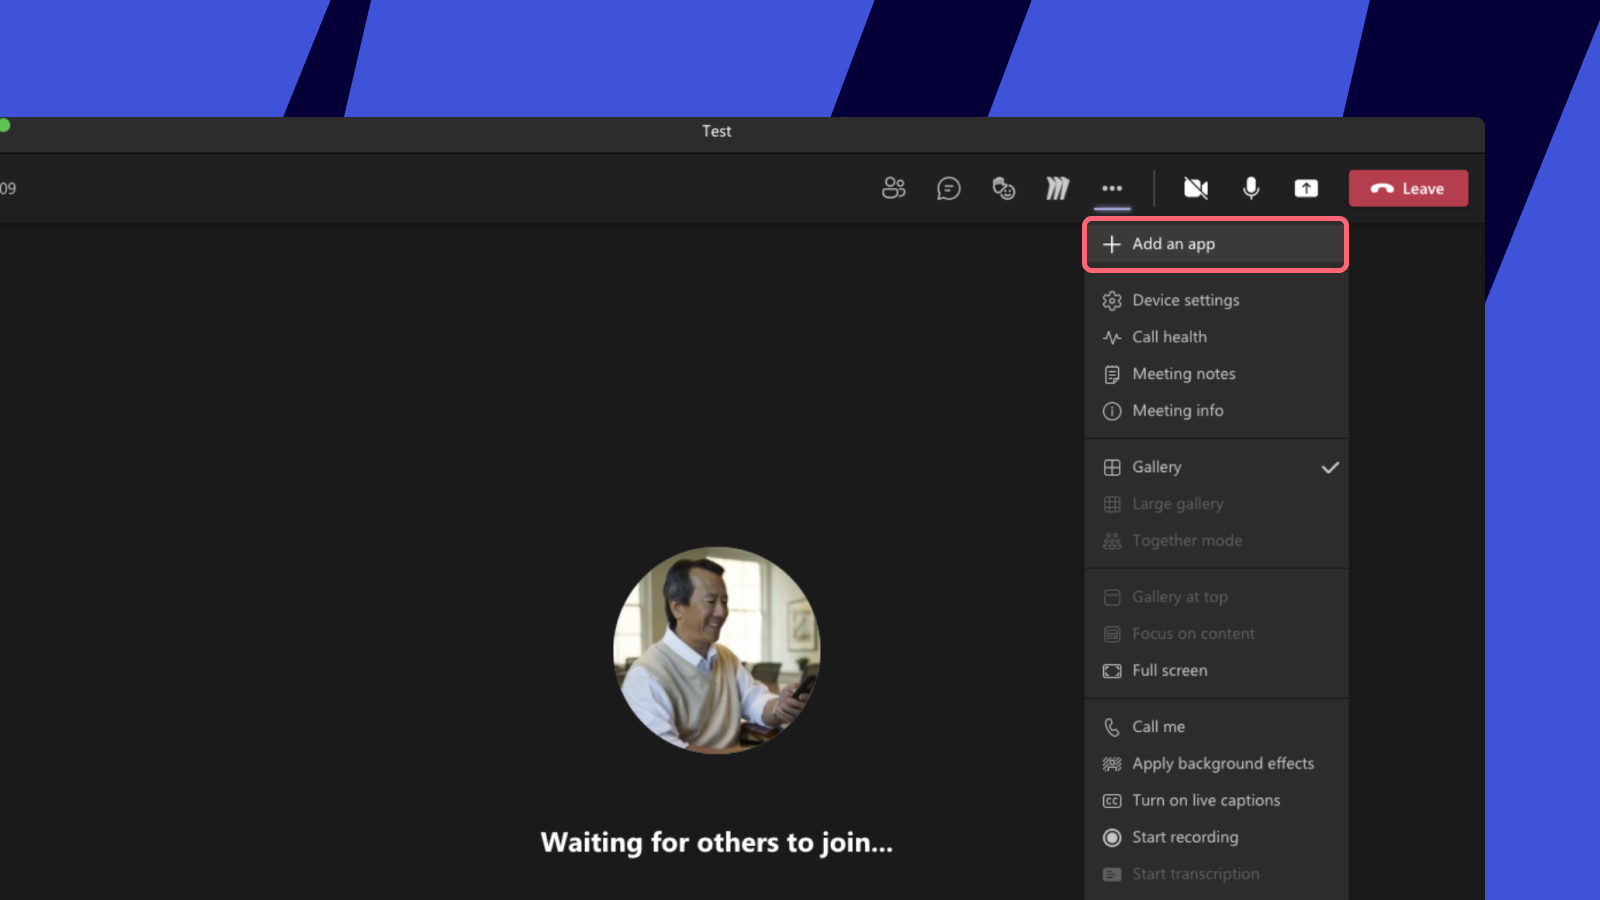
To add Miro to the Teams meeting, click on the drop-down More actions and select +Add an app. You can add a Miro board to a scheduled meeting only.
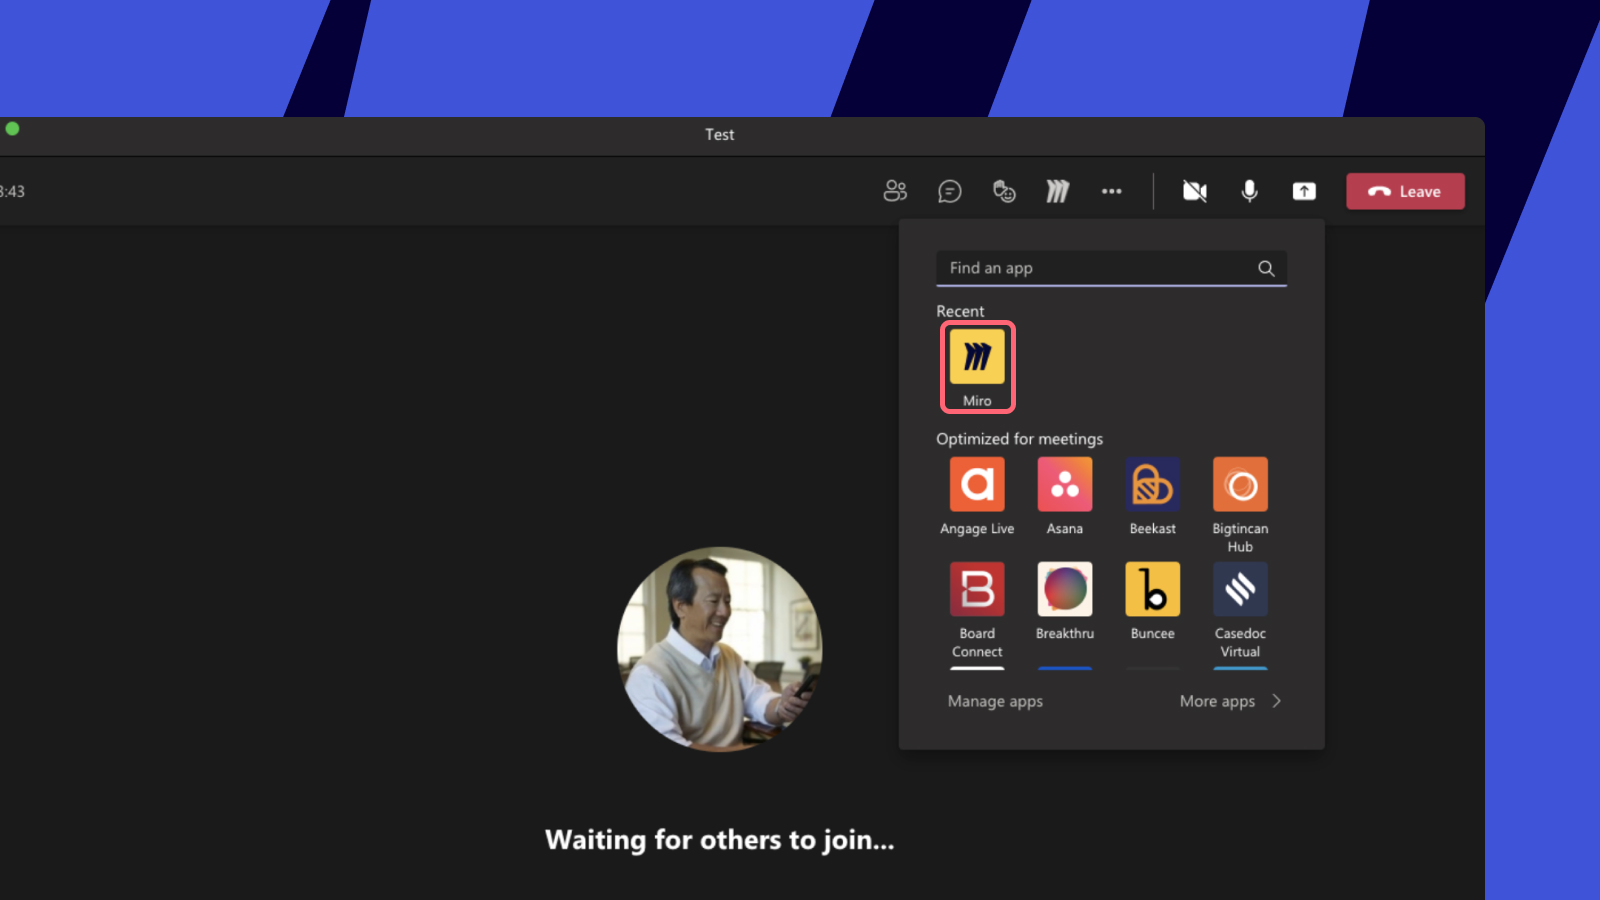
Search for Miro and click on the Miro icon.
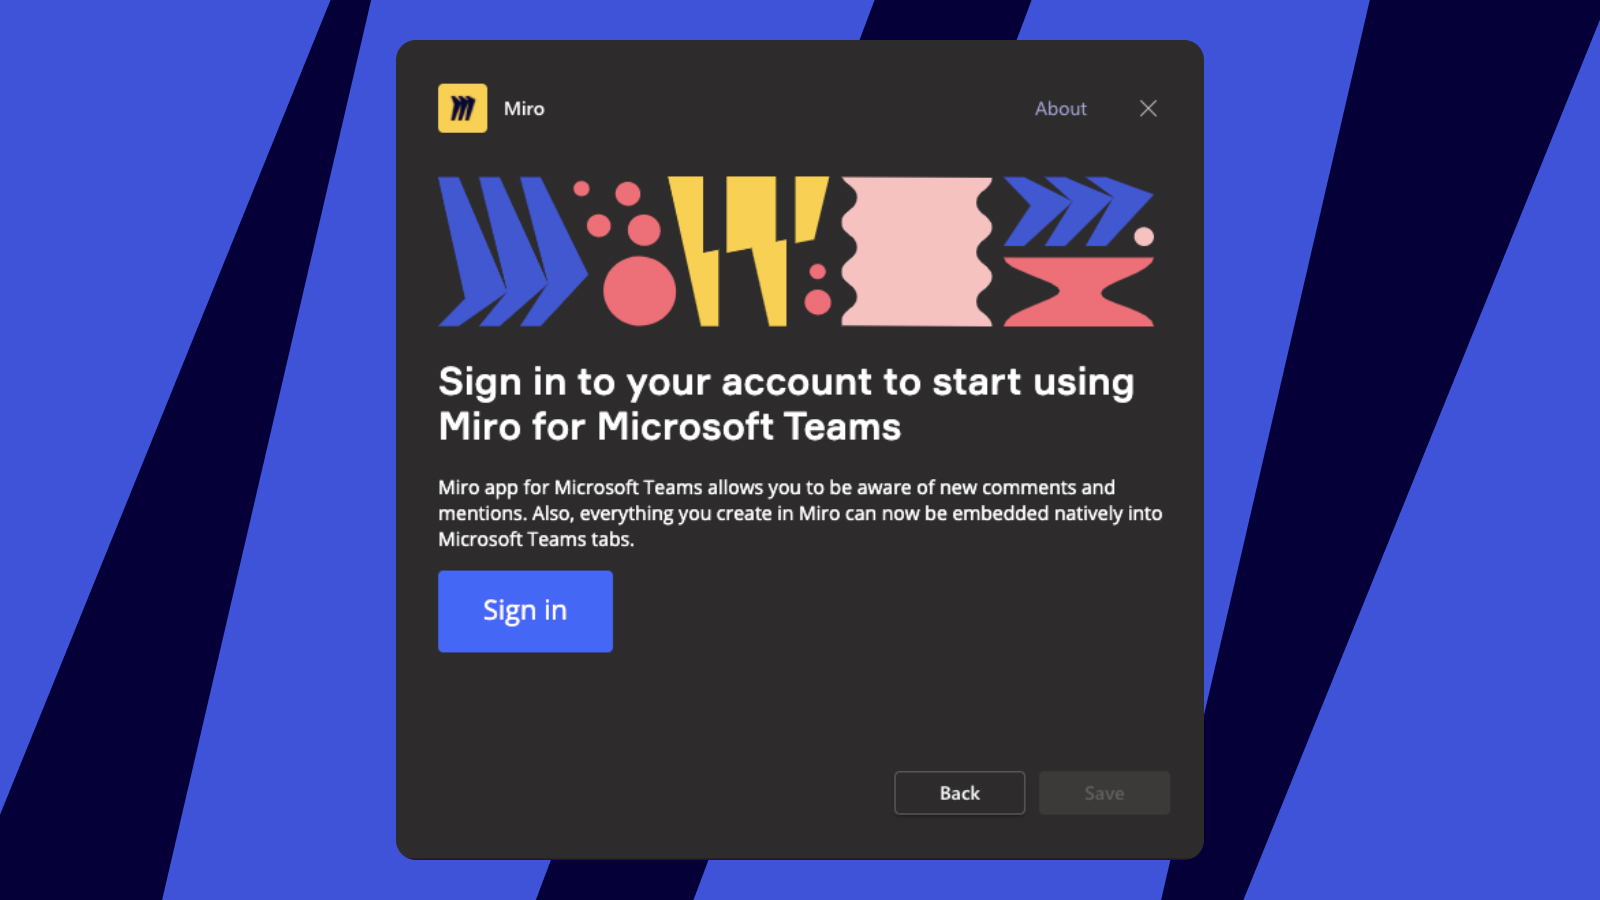
Here, you will be asked to sign up or sign in to your Miro profile.
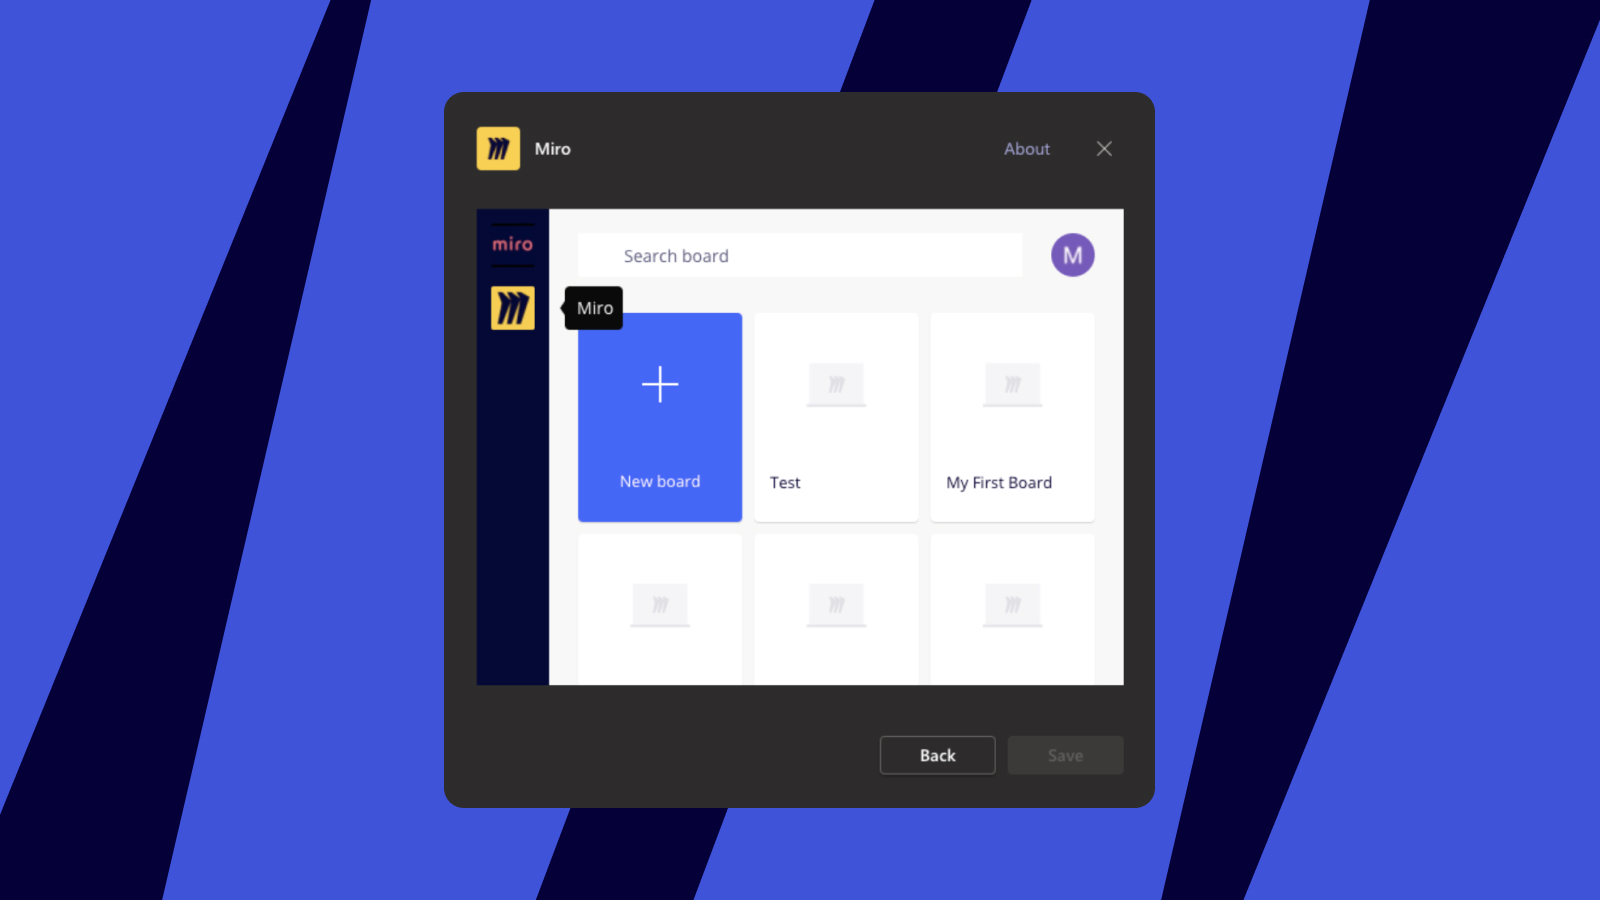
Select which board you want to present or choose to create a new, blank Miro board.
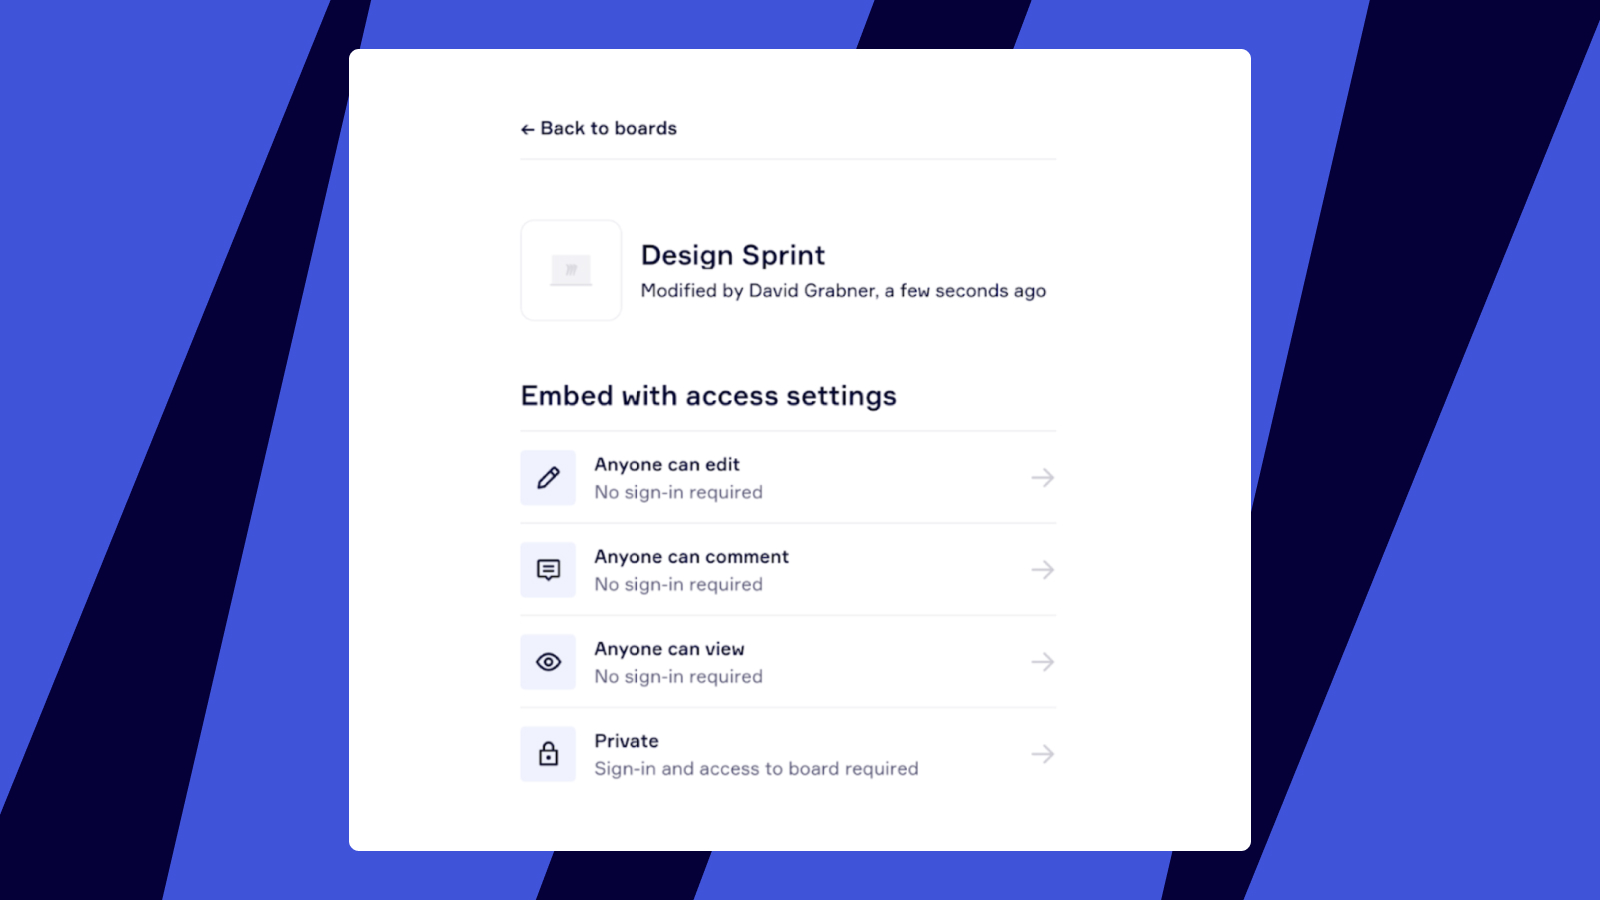
Here, you can set permissions for the rest of the meeting participants and give or restrict access to the board. You can choose from these permission types:
- Anyone can edit (no sign-in required)
- Anyone can comment (no sign-in required)
- Anyone can view (no sign-in required)
- Private
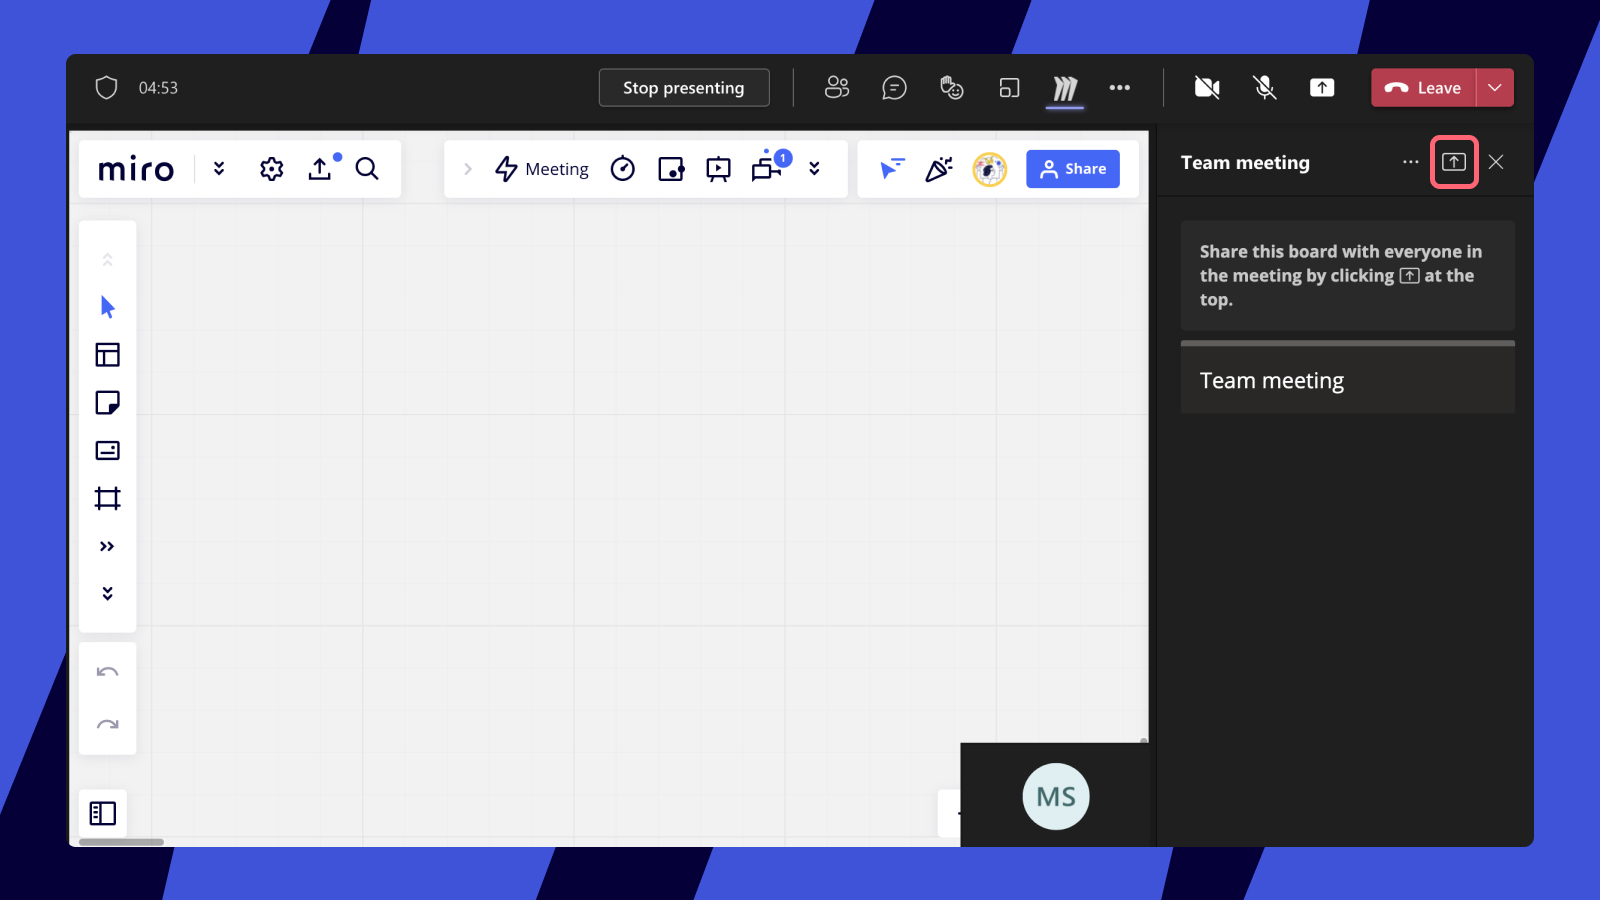
Now you can access your Miro board any time during the meeting in the specific board tab. If you create multiple boards, there will be a single tab for each board.
If you click on Miro, you will see the Miro tab pop up on the right side with the board you have attached to this meeting. You can select the Share-to-Stage button to send the board to all the participants and collaborate together at the same time.
You can stop sharing the board any time by clicking the Stop presenting button at the top.